





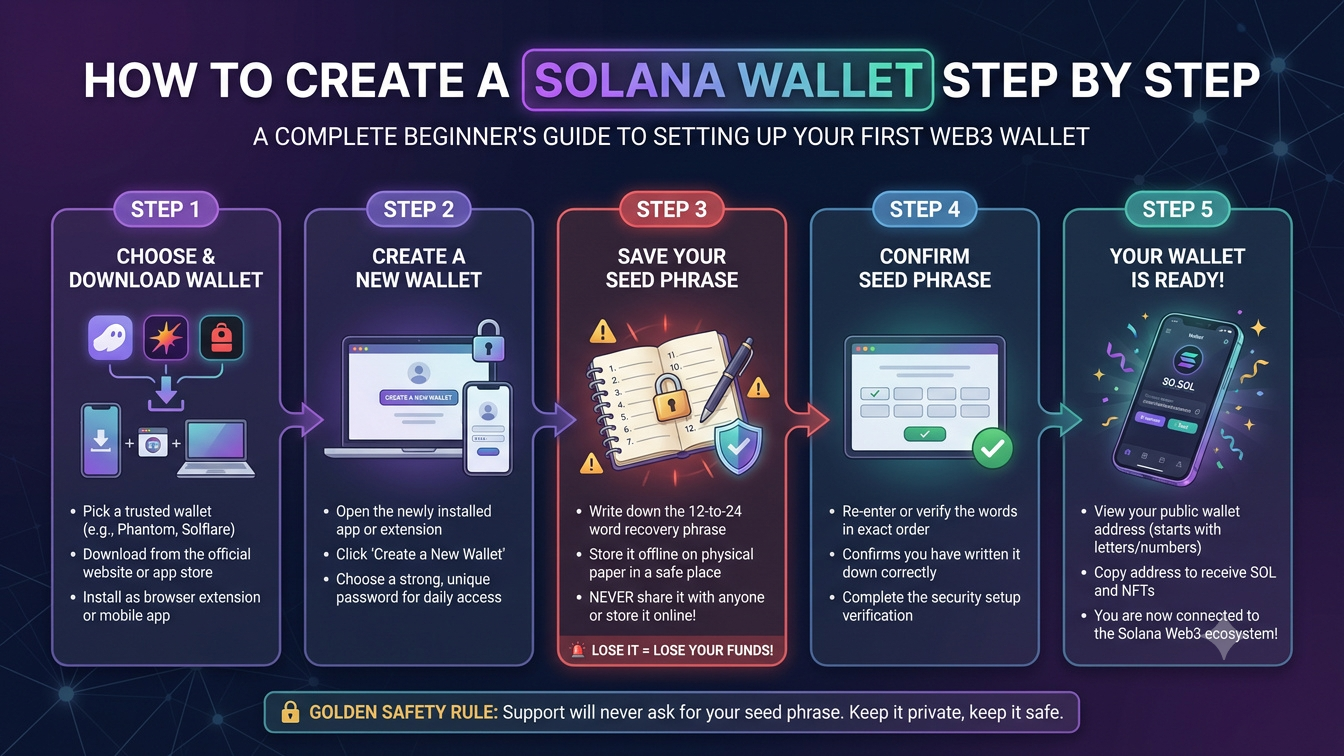
Solana has become a popular blockchain for cryptocurrency transfers, decentralised finance (DeFi), NFTs, token trading and blockchain applications. As more people explore the Solana ecosystem, creating a cryptocurrency wallet is one of the first steps towards using the network.
A Solana wallet allows users to receive and send SOL, manage Solana-based tokens, store access to NFTs and connect to decentralised applications. It also gives users control over their digital assets when they choose a self-custody wallet.
However, beginners may have questions before creating their first wallet. Which wallet should they choose? How do they generate a wallet address? What is a recovery phrase? Do they need SOL to start using the network?
This guide explains how to create a Solana wallet step by step, using popular wallet options such as Phantom and Solflare. It also covers wallet security, receiving SOL, transaction fees and common mistakes beginners should avoid.
1. What Is a Solana Wallet?
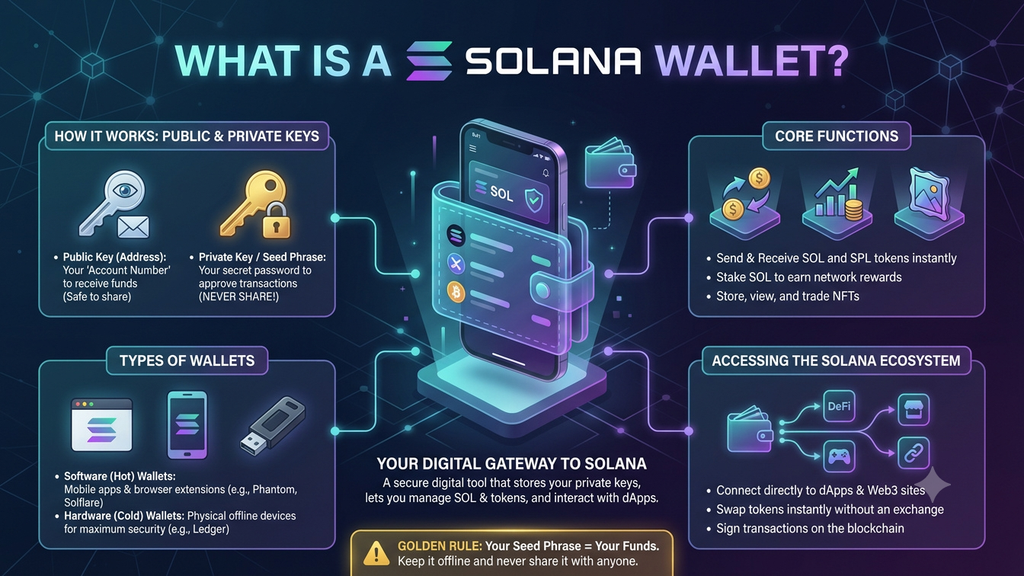
A Solana wallet is a software application or hardware device that allows users to access and manage digital assets on the Solana blockchain.
It manages the cryptographic keys required to authorise transactions. The actual SOL and tokens are recorded on the blockchain rather than stored inside the wallet application.
With a Solana wallet, users can:
- Send and receive SOL.
- Hold Solana-based tokens.
- View supported NFTs.
- Connect to decentralised applications.
- Swap supported digital assets.
- Stake SOL through compatible services.
- Check transaction history.
- Manage multiple wallet accounts.
For example, if someone sends you 1 SOL, the transaction is recorded on the Solana blockchain. Your wallet allows you to access the account and view the updated balance.
2. What Do You Need Before Creating a Solana Wallet?
Creating a basic Solana software wallet is generally free and takes only a few minutes. Before starting, prepare the following:
A smartphone or computer: You can create a wallet using a compatible mobile application or browser extension.
A reliable internet connection: You need internet access to download the wallet and interact with the Solana network.
An official wallet application: Choose a recognised wallet provider, such as Phantom or Solflare.
A secure recovery backup: A self-custody wallet may generate a secret recovery phrase. You must keep it safe because it can provide access to your wallet.
A secure password or device lock: Use a strong password and enable available biometric or device-security features.
You do not need to purchase SOL just to create a wallet. However, you will generally need a small amount of SOL to pay network fees when sending transactions or using certain applications.
3. Which Solana Wallet Should Beginners Choose?
There are several wallets that support the Solana blockchain. The best choice depends on your requirements.
| Wallet | Best For | Main Features |
|---|---|---|
| Phantom | Beginners | Simple interface, SOL, tokens, NFTs and multi-chain support |
| Solflare | Solana-focused users | SOL staking, token management and NFT support |
| Backpack | NFT and application users | Solana applications and multi-chain functionality |
| Jupiter Wallet | Token swap users | Wallet functionality connected to Jupiter’s trading ecosystem |
| Ledger | Long-term asset protection | Hardware-based private-key security |
For this tutorial, we will use Phantom Wallet as the main example. Solflare is also included as an alternative.
Before downloading any wallet, visit its official website rather than following advertisements or unknown links.
4. How to Create a Solana Wallet Using Phantom
Phantom is a self-custody cryptocurrency wallet that supports Solana and other blockchain networks. It is available as a mobile application and browser extension.
Follow these steps to create a new Phantom wallet.
Step 1: Visit the Official Phantom Website
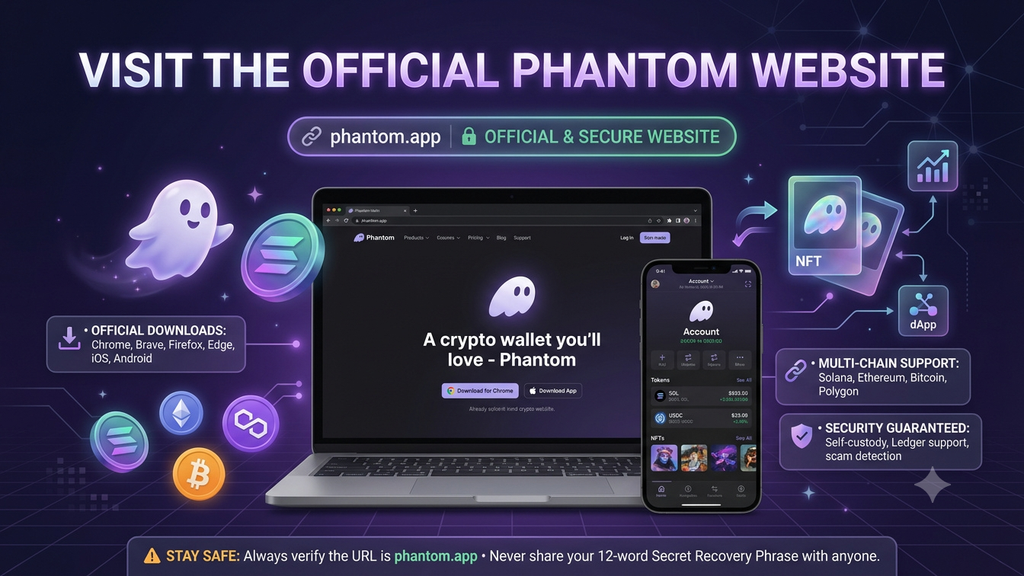
Open your browser and visit:
Check that the website address is correct before downloading anything.
Phantom offers applications for supported mobile devices and browser extensions. Choose the version that matches your device.
Avoid downloading wallet applications from unknown websites, social media messages or suspicious advertisements.
Step 2: Download the Phantom Wallet
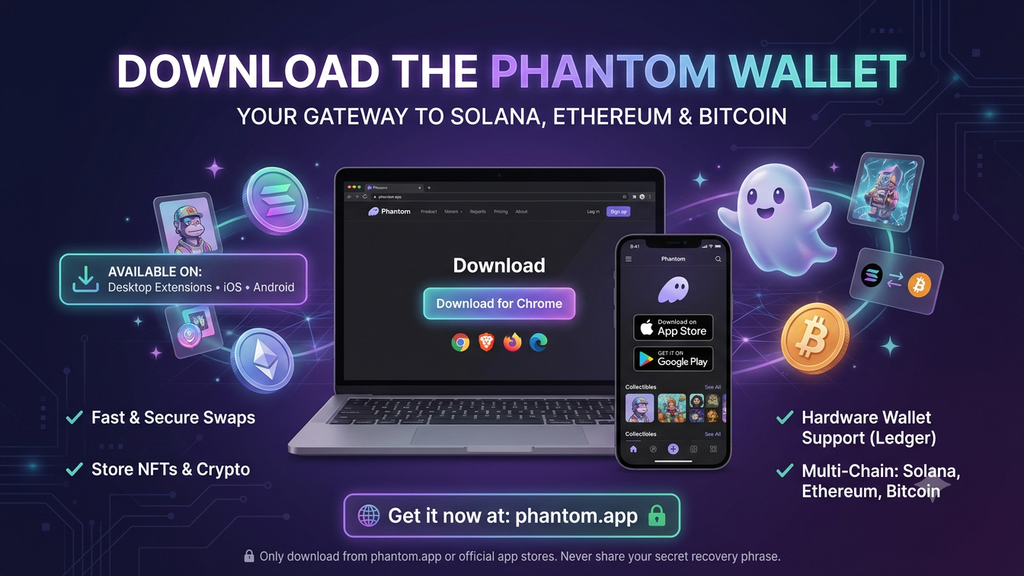
If you are using a smartphone, follow the official website’s link to the relevant app store.
If you are using a computer, select the supported browser extension and follow the installation instructions.
Before installing, verify the application publisher and make sure the download comes from the official source.
Step 3: Open Phantom and Select Create New Wallet
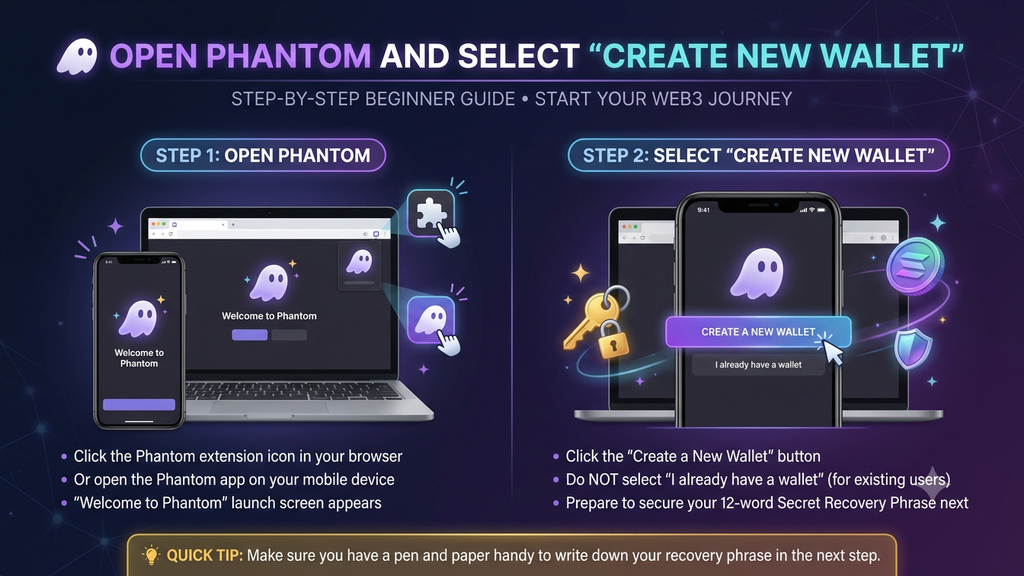
Once the application or extension is installed, open it.
On the welcome screen, select the option to create a new wallet.
Follow the on-screen instructions. Phantom may offer different account setup and recovery methods depending on the platform and current version.
Make sure you are creating a new wallet rather than importing an existing one.
Step 4: Choose a Recovery Method
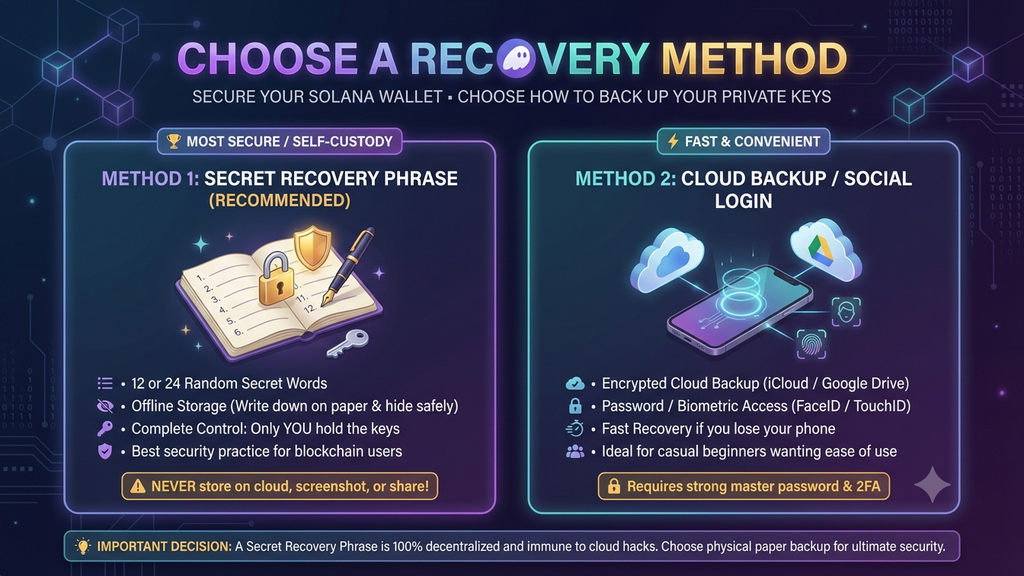
A self-custody wallet needs a secure way to restore access.
Depending on the available setup options, Phantom may provide a secret recovery phrase or a supported account-recovery method.
If a secret recovery phrase is generated, it is usually a sequence of words that acts as a master backup for the wallet.
Write it down carefully and preserve the exact order.
Never share this phrase with anyone. Anyone who obtains it may be able to access the associated wallet and control its assets.
Step 5: Set Up Wallet Security
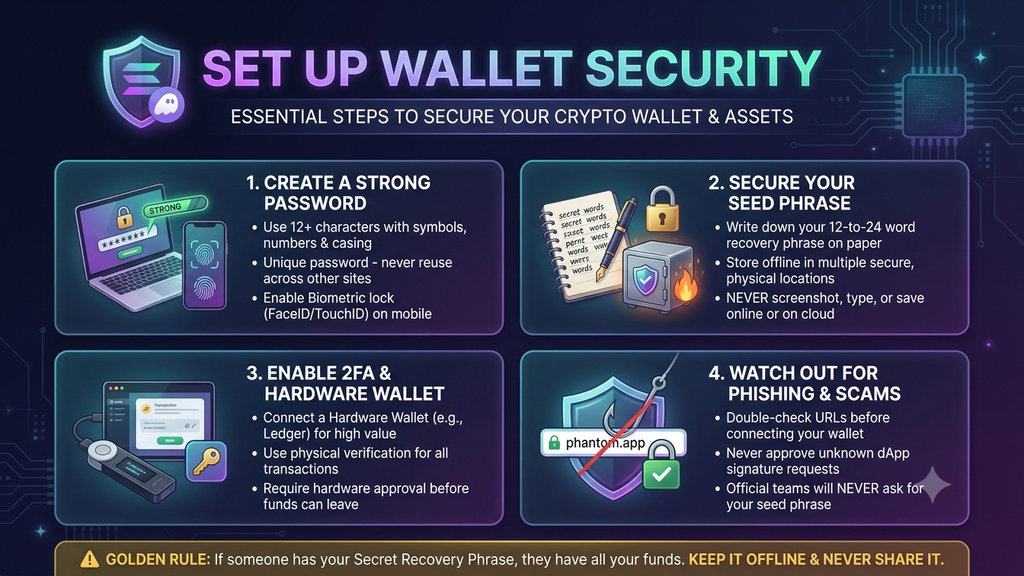
Create a strong password or enable the security features offered by your device and wallet.
Depending on the application, you may be able to use:
- A strong wallet password.
- Fingerprint authentication.
- Face recognition.
- Device-level security.
- Additional supported recovery options.
Use a password that you do not use for other websites or applications.
Step 6: Complete Wallet Setup
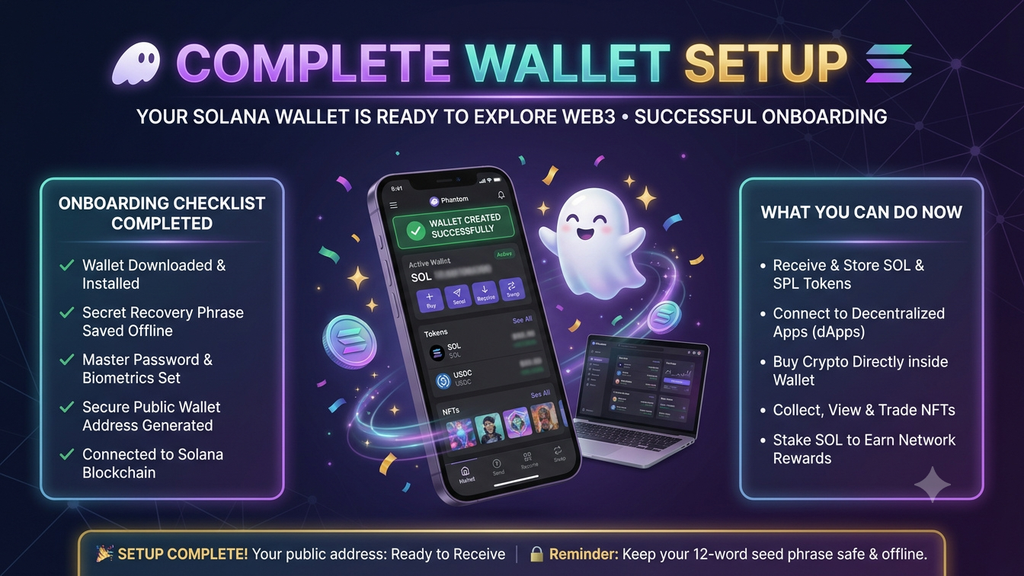
Follow the remaining instructions shown by Phantom.
After successful setup, the wallet dashboard should display your account and available wallet features.
You have now created a Solana-compatible wallet.
Step 7: Find Your Solana Wallet Address
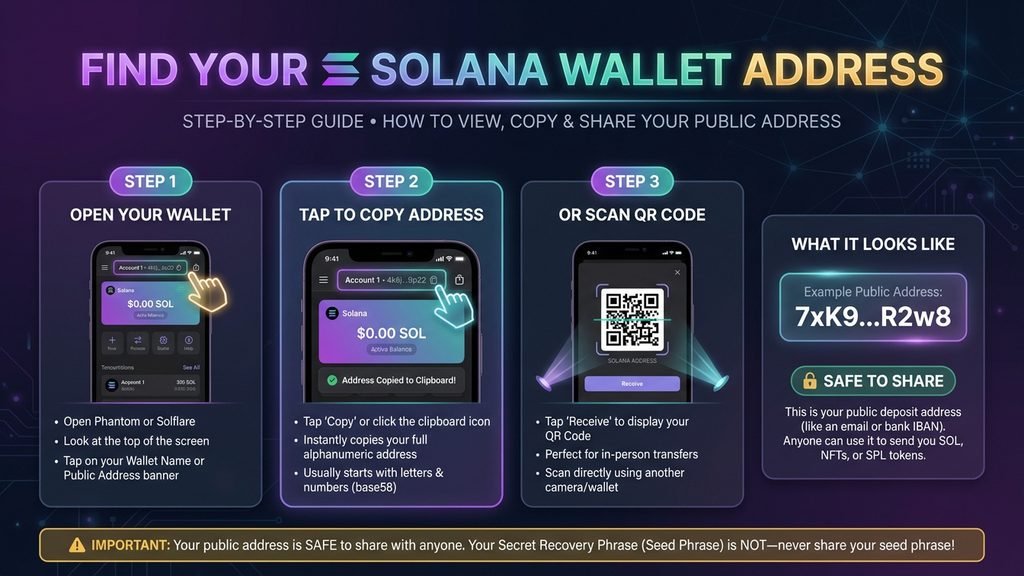
To receive SOL, you need your public wallet address.
Open Phantom and select the receive option. Choose SOL or the appropriate Solana asset to display the receiving address.
Copy the address carefully.
This is the address you can share with someone who wants to send you SOL.
Remember the difference:
- Public wallet address: Can generally be shared to receive cryptocurrency.
- Recovery phrase: Must remain private.
- Private key: Must remain private and should never be shared.
5. How to Create a Solana Wallet Using Solflare
Solflare is another popular self-custody wallet designed specifically for the Solana ecosystem. It supports SOL, tokens, NFTs, staking and compatible decentralised applications.
Here is a basic setup process.
Step 1: Visit the Official Solflare Website
Use the official website to find the supported mobile application or browser extension.
Step 2: Download Solflare
Select the version suitable for your device.
Install the official application or extension and open it.
Step 3: Select the New Wallet Option
Choose the option to create a new wallet.
Solflare provides wallet-generation options that may include a recovery phrase or a compatible hardware wallet.
For a basic software wallet, follow the recovery-phrase setup instructions.
Step 4: Save Your Recovery Phrase
If Solflare generates a recovery phrase, write down every word in the correct order.
Keep it in a secure offline location.
Do not take screenshots or share the phrase through messaging applications, email or cloud documents.
Step 5: Create a Password or PIN
Set up the available password, PIN or biometric security option.
This helps protect access to the wallet application on your device.
Step 6: Complete the Setup
After completing the confirmation steps, your wallet should be ready.
You can now view your public address, receive SOL, manage tokens and explore supported Solana applications.
6. How to Find Your Solana Wallet Address
After creating a wallet, the next step is learning how to find your public address.
Your Solana wallet address is a unique public identifier used to receive SOL and supported tokens.
The process is generally similar across wallet applications.
- Open your wallet.
- Select the Receive option.
- Choose SOL or the relevant Solana token.
- Copy the displayed wallet address.
- Share the address with the sender.
You can also use the copy-address option from your wallet dashboard.
Is it safe to share a Solana wallet address?
Yes. A public wallet address is designed to receive cryptocurrency and can generally be shared.
However, remember that Solana transactions are publicly recorded. Anyone who knows your address may be able to view its on-chain transaction history using a blockchain explorer.
Never share your recovery phrase or private key.
7. How to Add SOL to Your New Wallet
Creating a wallet does not automatically add cryptocurrency to it. You need to receive or purchase SOL separately.
There are several ways to fund your wallet.
Method 1: Receive SOL From Another Wallet
If someone already holds SOL, they can send it to your public Solana address.
The process is:
- Open your wallet.
- Copy your public Solana address.
- Share it with the sender.
- Ask the sender to select the Solana network.
- The sender enters your address and transfer amount.
- They review and confirm the transaction.
- Wait for the transaction to be processed.
- Check your wallet balance.
Always verify the receiving address before a transfer.
Method 2: Transfer SOL From a Cryptocurrency Exchange
You may also purchase SOL through a cryptocurrency exchange that supports withdrawals to the Solana network.
The general process is:
- Sign in to your exchange account.
- Open the withdrawal or send section.
- Select SOL.
- Choose the Solana network.
- Enter your Phantom or Solflare public address.
- Review the withdrawal fee and details.
- Send a small test amount first.
- Confirm that it arrives before transferring a larger amount.
The exchange may have its own withdrawal limits, verification requirements and fees.
Method 3: Use a Supported Wallet Purchase Service
Some wallets offer integrated cryptocurrency purchase services through third-party providers.
Availability depends on the wallet, payment method and country.
Before purchasing, compare the exchange rate, processing fee and final amount you will receive.
8. Do You Need SOL to Use a Solana Wallet?
You can create a Solana wallet without owning SOL.
However, SOL is generally required to pay network transaction fees.
For example, you may need SOL when:
- Sending SOL to another wallet.
- Transferring supported tokens.
- Interacting with decentralised applications.
- Swapping tokens.
- Performing certain account-related operations.
The exact fee depends on the transaction and network conditions.
Some applications may sponsor fees or offer alternative payment arrangements, but beginners should not assume every transaction will be free.
9. How to Send SOL From Your Solana Wallet
Once your wallet contains SOL, you can send it to another compatible Solana address.
Follow these general steps:
- Open Phantom or Solflare.
- Select the Send option.
- Choose SOL.
- Enter the recipient’s public Solana address.
- Enter the amount.
- Review the recipient address and transaction fee.
- Confirm the transaction in your wallet.
- Wait for the network to process it.
- Check the transaction status.
Important transfer precautions
- Verify the recipient address before sending.
- Confirm that you are using the Solana network.
- Send a small test amount when transferring to a new address.
- Keep enough SOL for network fees.
- Never approve a transaction you do not understand.
Blockchain transfers are generally irreversible after finalisation.
10. How to Check a Solana Transaction
Solana Explorer is a blockchain explorer that allows users to search for public transaction records.
To check a transaction:
- Open your wallet’s transaction history.
- Select the relevant transaction.
- Copy its transaction signature.
- Open Solana Explorer.
- Paste the signature into the search field.
- Review the transaction details.
You can generally check information such as:
- Transaction status.
- Transaction signature.
- Sender and recipient addresses.
- SOL or token amounts.
- Transaction fee.
- Slot and block information.
- Timestamp.
Never enter your wallet recovery phrase or private key into a blockchain explorer.
11. How to Secure Your Solana Wallet
Wallet security is one of the most important parts of cryptocurrency ownership.
A self-custody wallet gives you control over your keys, but it also makes you responsible for protecting them.
1. Protect Your Recovery Phrase
Your recovery phrase is the most important backup for many self-custody wallets.
Write it down and store it in a secure offline location.
Never share it with wallet support, exchange representatives or anyone claiming to help recover your account.
2. Download Only Official Applications
Fake wallet applications may imitate legitimate products to steal private keys.
Always access download links through the official provider website.
3. Use a Strong Password
Create a unique password for your wallet application.
Enable device security and biometric authentication where available.
4. Check Every Transaction
Review the recipient, amount, network and transaction instructions before approving.
Do not sign unexpected messages or transactions simply because a website asks you to.
5. Avoid Suspicious Airdrops
Some fraudulent tokens and NFT websites are designed to trick users into connecting their wallets or signing malicious transactions.
Do not visit unknown claim websites or trust unsolicited giveaway messages.
6. Consider a Hardware Wallet
If you plan to hold a significant amount of SOL, consider a compatible hardware wallet such as Ledger.
Hardware wallets help keep private keys isolated from ordinary internet-connected devices. They do not eliminate every risk, so transaction verification and recovery-phrase security remain essential.
12. Common Mistakes to Avoid When Creating a Solana Wallet
Beginners sometimes make avoidable mistakes during wallet setup and their first transactions.
Using fake wallet websites: Always verify the official domain before installing an application.
Losing the recovery phrase: If you lose access to your wallet and have no valid recovery method, you may permanently lose access to your funds.
Sharing private information: Never send your recovery phrase or private key to another person.
Sending funds to the wrong network: Always verify that the recipient supports the Solana network and the specific asset being transferred.
Ignoring network fees: Keep enough SOL available for transaction fees.
Approving suspicious transactions: Read the transaction details before signing.
Transferring a large amount immediately: Test with a small transfer before moving significant funds to a new address.
13. Solana Wallet vs Exchange Account: What Is the Difference?
A cryptocurrency exchange account and a self-custody wallet are not the same.
| Feature | Exchange Account | Self-Custody Solana Wallet |
|---|---|---|
| Private-key control | Usually managed by the exchange | Controlled by the wallet user |
| Account access | Exchange login | Wallet credentials and recovery method |
| Cryptocurrency transfers | Subject to exchange rules | Direct blockchain transactions |
| Recovery | May have account recovery support | Depends on wallet backup and recovery method |
| Responsibility | Shared with the service provider | Primarily the user’s responsibility |
| Best for | Buying and selling through an exchange | Managing assets directly on Solana |
Final Thoughts
Creating a Solana wallet is a straightforward process when you choose a reliable provider and follow the correct security steps. Phantom and Solflare are practical options for beginners who want to receive SOL, manage tokens and explore decentralised applications.
The most important part of setting up a self-custody wallet is protecting your recovery phrase and understanding how transaction approvals work. Start with a small amount, verify every address and avoid suspicious applications or links.
Once you understand these basics, you can explore the Solana ecosystem with greater confidence while keeping control of your digital assets.
Enjoying Cryptorevery?
If you find our crypto insights and market updates helpful, add Cryptorevery as a Preferred Source on Google to see more of our latest content.
Found this article useful?
If this content helped you, you may support the developer by contributing the cost of a coffee.
Pay $5

